Utility Setup Checklist for RV Move-In Day
September 3, 2026 · By Magnolia RV Park
Move-in day at a new RV park is exciting, but it can also be hectic. After arriving and parking, one of the first tasks is connecting utilities. Doing it carefully prevents electrical problems, leaks, and frustrating problems later. A simple checklist helps you set up correctly and safely.
This guide offers a step-by-step utility setup checklist for RV move-in day. For a deeper explanation of how park hookups work, see our pillar, RV Hookups Explained: Electric, Water, and Sewer for Long Stays.
Before You Arrive
- Confirm what utilities are available at your site. At our park, utilities are confirmed per site, so ask management about specifics.
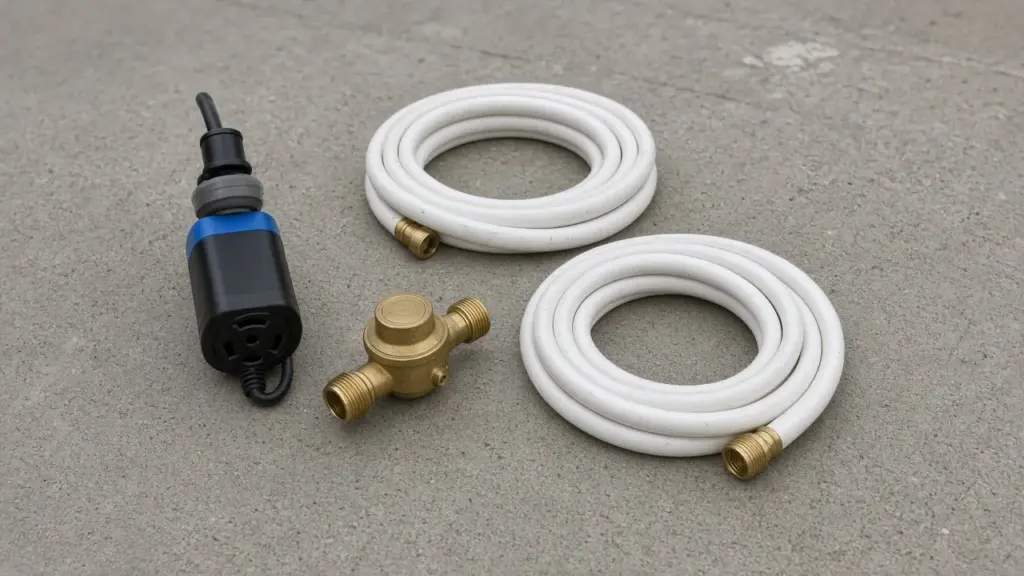
- Make sure you have the right cords, adapters, hoses, and fittings.
- Check your equipment for damage.
- Plan to arrive in daylight. At our park, RVs must arrive before 6 pm, and gate and arrival notes are sent by text.
Step 1: Position and Level Your RV
Park in your designated spot, following any instructions from management. Drive slowly, observe the 10 mph speed limit, and stay off the grass. Level your RV and set stabilizers or jacks. Chock the wheels if you have a towable.
Step 2: Inspect the Pedestal
Before plugging in, look at the utility pedestal:
- Check for visible damage
- Make sure the breaker is off
- Note the outlet types available
If anything looks damaged or unsafe, contact management. Never tamper with park hookups.
Step 3: Connect Electrical
- Turn off the breaker at the pedestal.
- Turn off major appliances in your RV.
- Connect your surge protector, if you use one.
- Plug in your power cord securely.
- Turn on the pedestal breaker.
- Check that power is flowing and that your surge protector shows no faults.
- Turn on appliances one at a time.
Use properly rated cords and adapters. Never run cords from other sites, which is prohibited at our park. If breakers trip, our post on RV breakers and GFCIs explains troubleshooting.
Step 4: Connect Water
- Use a dedicated drinking water hose.
- Attach a pressure regulator at the spigot.
- Add a water filter if you use one.
- Connect the hose to your RV’s city water inlet.
- Turn on the water slowly.
- Check for leaks at every connection.
Our post on water softeners for RVs covers whether a softener might help in your situation.
Step 5: Connect Sewer
If your site includes a sewer connection:
- Wear gloves.
- Inspect your sewer hose for cracks or damage.
- Connect the hose securely to your RV and the sewer inlet.
- Use a seal or adapter as needed to prevent odors and leaks.
- Keep tank valves closed until you are ready to dump.
Our park uses a septic system, so septic-safe products are required. Our post on septic-safe toilet paper and cleaning products for RVs explains what to use.
Step 6: Check Propane
- Open the propane valve slowly
- Check for the smell of propane
- Test your propane detector
- Light appliances according to your manual
If you smell propane, shut off the valve and get help.
Step 7: Test Systems
- Run faucets and check for leaks under sinks
- Test the toilet
- Turn on the water heater after the tank is full
- Test the air conditioner and furnace
- Check lights and outlets
Step 8: Safety Checks
- Test smoke, carbon monoxide, and propane detectors
- Locate your fire extinguisher
- Make sure cords and hoses are not creating tripping hazards
Step 9: Set Up Your Interior
Once utilities are working, set up your interior essentials. Run a dehumidifier if the RV has been closed up; our post on choosing and using a dehumidifier in an RV explains why humidity control matters in Southeast Texas.
Step 10: Record Your Setup
Take photos of your setup, note any issues, and record connection details in your maintenance log. This makes future troubleshooting easier.
Keeping Your Site Clear
Keep hoses and cords neatly arranged. Items cannot be stored on or under the site at our park, so store extra equipment inside your RV or vehicle.
Asking Questions
If anything is unclear, ask management. Text (281) 205-1959. It is better to ask than to guess, especially with electrical and sewer connections.
Common Move-In Mistakes to Avoid
A few mistakes come up again and again on move-in day. One is plugging in with appliances running, which can cause a surge or trip breakers. Another is forgetting the pressure regulator, which can expose your plumbing to high water pressure. Some people open the black tank valve and leave it open, which can cause solids to build up in the tank. Others connect hoses without checking for leaks and discover a puddle days later.
Taking your time and following a checklist helps avoid these problems. If you are tired from a long drive, set up the essentials first and handle the rest the next morning with fresh eyes.
Making It Routine
If you move often, keep a printed copy of this checklist in your RV. Following the same steps every time builds good habits and reduces the chance of forgetting something important, even on a busy or stressful day.
After the First Night
The morning after move-in is a good time to double-check your setup. Walk around your RV and look for drips at hose connections, puddles under the RV, or cords that have shifted. Check that your RV is still level, since jacks and stabilizers can settle slightly after the first night. Look inside cabinets under sinks for any signs of leaks. Confirm that your refrigerator is cooling properly and your water heater is producing hot water.
If you notice anything unusual, address it right away. Small issues discovered early are much easier to fix than problems that go unnoticed for weeks.
Organizing Your Utility Gear
Having your utility gear organized makes move-in day smoother. Keep hoses, cords, adapters, fittings, gloves, and tools in labeled bins in a dedicated compartment. Store drinking water hoses separately from sewer equipment to prevent contamination. Before any move, check that all your gear is present and in good condition, and replace worn items. A well-organized kit saves time and frustration, especially if you arrive late in the day.
Seasonal Setup Considerations
If you move in during winter, consider how you will protect hoses from freezing during cold snaps. In summer, shade hoses and cords when possible, since heat and sun can degrade them over time.
Getting Help From Neighbors
If you are new to RV life, experienced neighbors can be a great resource. Many long-term residents are happy to share tips about setup at the park, such as how they route hoses or protect connections during storms. Respect their time, and remember that management is always the right contact for questions about park equipment and rules.
Frequently Asked Questions
What utilities are available at my site?
Utilities are confirmed per site at our park. Ask management about specifics.
Do I need a pressure regulator?
Many RVers use one to protect plumbing from high water pressure.
Can I run a cord from another site?
No. Running cords from other sites is prohibited.
What products should I use with the septic system?
Septic-safe products only.
Move In With Confidence
Read our FAQ, explore our amenities, or check availability.
Check Availability or call or text (281) 205-1959
Magnolia’s Finest RV Park · 32020 Old Hempstead Rd, Magnolia, TX 77355 · Contact us