
RV Roof Inspection Checklist for Full-Timers
October 17, 2025 · By Magnolia RV Park
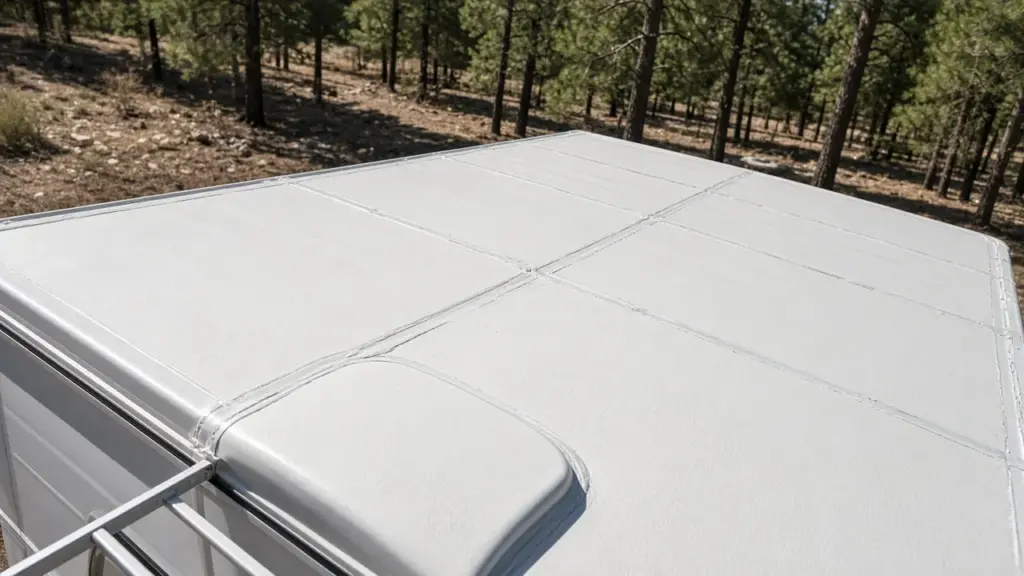
Your RV roof protects everything below it, and it takes more abuse than any other part of the rig. Sun, heat, rain, falling pine needles, and the occasional storm all work on it day after day. When you live in your RV full-time, a small roof leak can do real damage before you notice it inside.
Regular roof inspections are one of the most valuable habits a full-time resident can build. This checklist walks through what to look at and how often, and it points out when to call a professional. Always follow your manufacturer’s guidance for your specific roof material.
Safety First
Before anything else: only go on your roof if your RV is designed for it and you can do so safely. Many RV roofs are not built to be walked on, and falls are a real risk. Use a sturdy ladder, avoid wet or windy conditions, and never work on the roof alone.
If you cannot safely get on the roof, you can still inspect a lot from a ladder at the edges, and you can hire a mobile technician for a full inspection. That is money well spent.
How Often to Inspect
- Monthly: A quick visual check of what you can see from a ladder
- Every few months: A more thorough inspection of seams, sealant, and fixtures
- After storms: Look for damage, debris, and loose components
- Yearly: Consider a professional inspection
Our full-time RV maintenance schedule places roof checks alongside the rest of your routine.
Step 1: Clear the Roof
You cannot inspect what you cannot see. Sweep off leaves, pine needles, and debris with a soft broom. In pine country, needles collect around vents and in low spots, where they trap moisture. Clearing them regularly is part of prevention.
Step 2: Check the Roof Membrane
Walk your eyes across the entire surface. Look for:
- Cracks, tears, or punctures
- Bubbles or areas where the membrane is lifting
- Soft spots underfoot, which can signal water damage below (if you are walking the roof)
- Chalky residue or thinning on older roofs
- Stains or discoloration that suggest pooling water
Different roof materials age differently. Rubber roofs may chalk, while fiberglass may show cracking. Know your roof type and what your manufacturer recommends.
Step 3: Inspect Seams and Edges
Seams and edges are where many leaks begin. Look closely at:
- The seams where roof sections meet
- The front and rear caps
- Side edges and trim rails
- Screws along the edges, which should be covered with sealant
Sealant here should be intact, flexible, and firmly attached. Cracked, shrinking, or peeling sealant needs attention.
Step 4: Examine Every Roof Opening
Everything that penetrates the roof is a potential leak point. Check each one:
- Roof vents and fans: Look for cracked covers and failing sealant around the base
- Skylights: Check for cracks and gaps around the frame
- Air conditioner: Inspect the shroud for cracks and check that the unit sits firmly on its gasket
- Antennas and satellite mounts: Look at mounting screws and sealant
- Plumbing vents: Check caps and sealant
- Solar panel mounts and wiring entry points, if installed
Step 5: Look at the Ladder and Roof Accessories
Ladder mounting points, luggage racks, and awning rails can loosen over time and allow water in around their screws. Tighten and reseal as needed.
Step 6: Check From Inside
The roof inspection is not complete until you look inside. Check ceilings, especially around vents, the AC unit, skylights, and corners. Look for:
- Water stains or discoloration
- Sagging ceiling panels
- Musty smells
- Soft areas on walls near the roof line
Inside signs often mean water has been getting in for a while, so investigate promptly.
Step 7: Document What You Find
Take photos of each area during every inspection. Comparing photos over time makes it easy to spot changes, such as sealant that is starting to crack. Add notes to your maintenance log.
What Sun and Heat Do to RV Roofs
In Southeast Texas, UV exposure and heat are the main enemies of roof materials and sealants. They cause sealant to dry out and crack and can break down roof membranes over time. A covered site reduces direct sun exposure significantly, which is one reason covered parking is popular with long-term residents. Our post on covered vs. uncovered RV sites in Texas explains the benefits, and our post on preparing your RV for Texas summer covers other summer steps.
Timing Roof Work Around the Seasons
The calendar matters when you plan roof work in Southeast Texas. Midsummer heat makes roof surfaces extremely hot, which is uncomfortable and can affect how some sealants cure. Rainy stretches make it hard to keep surfaces clean and dry long enough for repairs. For most residents, fall and early spring offer the best working conditions: moderate temperatures, lower humidity, and fewer storms.
A practical rhythm is to do a thorough inspection and any resealing in the fall, after the worst heat and before winter, and a second check in early spring before storm season and pine pollen arrive. Add quick checks after every major storm, and before and after hurricane season. Our year-round Texas weather guide explains what each season brings.
Keeping Supplies on Hand
It helps to keep a small roof kit so you can deal with minor problems quickly. A useful kit includes a soft broom, a compatible self-leveling sealant, a non-sag sealant for vertical edges, a caulk gun, a plastic scraper, clean rags, a mild cleaner recommended for your roof type, and a roll of roof repair tape for temporary emergency patches. Store sealants out of the heat so they stay usable, and check expiration dates before relying on them.
When to Reseal
Reseal when sealant is cracked, shrinking, peeling, or missing. Use a sealant compatible with your roof material, and follow the product and manufacturer instructions. Self-leveling sealant is commonly used on horizontal surfaces, while non-sag sealant is used on vertical edges.
When to Call a Professional
Call a qualified RV technician if you find:
- Soft spots or sagging areas
- Large tears or punctures
- Widespread cracking or membrane failure
- Evidence of long-term water intrusion inside
- Damage after a major storm
Many insurance policies require prompt reporting of storm damage, so document it before repairs.
How Roof Care Connects to Park Standards
Long-term parks care about RV condition. At our park, RVs must be in good condition, and tarps and covers are not allowed on RVs. That makes preventive roof care even more important, because you cannot simply throw a tarp over a problem. A well-maintained roof is part of keeping your RV livable and park-ready. Our park rules list the RV condition standards.
Frequently Asked Questions
How often should I inspect my RV roof?
Do a quick visual check monthly, a thorough inspection every few months, and another after any significant storm. A yearly professional inspection is a good idea.
Can I walk on my RV roof?
Only if your manufacturer says the roof is designed for it and you can do so safely. If not, inspect from a ladder or hire a technician.
What are the signs of an RV roof leak?
Water stains, sagging ceiling panels, musty smells, soft spots near the roof line, and cracked sealant are common signs.
Does a covered site help protect an RV roof?
Yes. Overhead cover reduces direct sun and some weather exposure, which helps slow wear on sealants and roof materials.
Protect Your Roof on a Covered Site
Magnolia’s Finest has eight covered sites and cement pads throughout, in a quiet gated park for long-term residents. See our amenities and tell us about your RV and your dates.
Check Availability or call or text (281) 205-1959
Magnolia’s Finest RV Park · 32020 Old Hempstead Rd, Magnolia, TX 77355 · Contact us